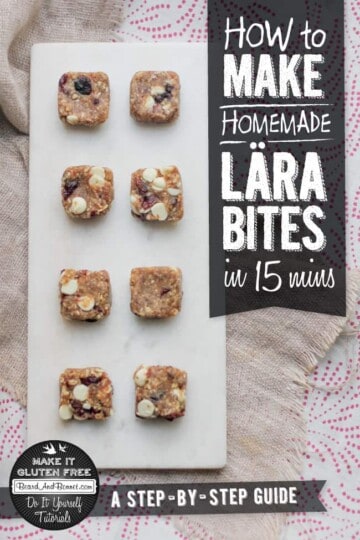
By now you all know I am obsessed with making lära bars at home. I have made quite a few homemade variations here over the past couple of years and it has become crystal clear that B&B readers are just as obsessed with them as we are! Last weekend Eliza asked me to make her a homemade lära bar with the flavors of her favorite cookie; oatmeal, cranberry and white chocolate. So, while I was gathering the ingredients I grabbed my camera too and decided that maybe this time instead of sharing just the recipe I would share the 5 simple steps to make these delicious raw bars with you too.
These bars can be whipped up in about 15 minutes with no problem at all and cleanup is so minimal that you will be wondering why you didn't start making your own lära style snacks at home sooner! Not a fan of this flavor combo? Not a problem. I am including links to 6 other homemade lära bars and bites so that there is a little something for everyone.
Step 1: Assemble your ingredients and prep them.
This step is pretty straightforward right? Gather the different components and flavors that you want to show case in your homemade lära bars and get them ready. Remove the pits from the dates and roughly chop them, measure out all of your dry ingredients and plug in your food processor.
Step 2: Process the base of your lära bar.
The base of your lära bars will always contain the dates and nuts plus this time I chose to include oats in the mix. Think of this set of ingredients as the "glue" that will hold all of the other amazing mix in's in your bar. Process until the contents of your food processor are all similar in size and shape with no large chunks remaining like the picture below.
Step 3: Choose your flavor mix in's!
For this particular batch of lära bars I chose coconut oil and gluten free vanilla extract. Place the extract and coconut oil in the food processor and process until completely combined, about 15-20 seconds. The texture and appearance will not change in this step.
Step 4: Add the "star" flavor additions into the mix.
Now, this step is very important...do not run the processor on its own to combine the flavor mix in's into the base simply pulse until the dried fruit and additional mix in's are incorporated like the picture below. If you over process you will wreck the texture of your lära bar. Trust me, it's not pretty or appetizing if over processed.
Step 5: Pick a shape!
This step is super fun and probably my favorite part of the process besides eating homemade lära treats! You can use pretty much any thing here to shape your little snacks. I like using my square silicone candy molds the best because they are not only a nice snacking size for the adults and preteen in our house, but they are also the perfect size and shape for Kash's little toddler hands to grab onto.
PrintWhite Chocolate & Cranberry Oatmeal Cookie Lära Bites (Gluten Free)
Ingredients
- ½ cup raw walnuts
- ½ cup gluten free oats
- 1 cup fresh Medjool dates, pitted and roughly chopped
- 2 tablespoons coconut oil
- 1 teaspoon vanilla extract
- pinch of kosher salt
- ½ cup dried cranberries
- ½ cup gluten free white chocolate chips
Instructions
- Combine the walnuts, oats, and dates in the bowl of a food processor fitted with the “S” blade. Process for about 1 minute until all of the ingredients come together like a dough and are similar in size with no large chunks remaining. Add the coconut oil, vanilla, and salt then process to incorporate.
- Add the cranberries and white chocolate chips to the processor and pulse until just incorporated; not so much that the cranberries and white chocolate loose their chunkiness in the mixture.
- For Bars: Transfer the dough to a small sheet pan or plate lined with parchment paper and shape the dough with your hands into a rectangle. Slice the dough into bars and serve immediately or store in the refrigerator until ready to eat.
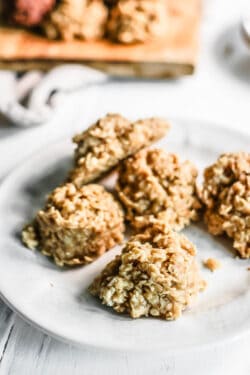
- For Bites: Scoop the mixture into tablespoon size portions and roll each one in the palm of your hand to form a sphere serve immediately or store in the refrigerator until ready to eat.
- For molded shapes: Fill silicone molds in the desired shape with the dough; pressing the dough into any corners. Refrigerate for 15-20 minutes to set then gently remove the shapes from the pan serve immediately or store in the refrigerator until ready to eat.
Hungry for more lära bar flavor combinations? I have you covered!


Cheryl Landolt says
Was so excited to see this recipe. White chocolate is my favorite 🙂
thismess says
Yay!! I love it too! Hope you enjoy them as much as we do 🙂
La Cuisine Helene says
I like to make my own bars and will try this recipe. My kids prefer homemade. Thanks!
Meg says
Yay! I hope you enjoy this recipe as much as we do. My kids are larabar snobs these days and won't eat anything but homemade bars.
Dana @ 3boysunprocessed says
I love making homemade Lara bars! My kids love them too, and the possibilities are endless as far as adding different flavors. I'll have to try these soon 🙂
Meg says
I hope you enjoy these as much as we do Dana!
Vicky says
Loving all your how to series posts! I made larabars for the first time back in 2012 and loved them! No reason to go out and buy these in store when you can easily make your own and really play with the different flavor combinations.
Meg says
Thank so much Vicky! I really love the texture and the depth of flavor that I can get in my homemade versions so much more than store bought too.
Andrea says
I was sort of skeptical as to how these would turn out, but they're absolutely delicious!! Definitely making these on a regular basis.
Meg says
I am so glad you liked them Andrea!!
cheri says
I'm making these they are just perfect.
E says
Wow, will try this out, looks lovely!
http://eoediary.blogspot.se/
Meg says
I hope you like them as much as we do!!
Lisa says
Long day, no lunch. Saw this and in LESS than 15 minutes two varieties ( I made the chocolate chip cookie style, too) are chilling in the fridge. My subs: dried cherries, carob chips, added 1/2 tsp. cinnamon. You rock.
Meg says
Lisa, you are a lara bar making rock star!!! 2 batches in less than 15 minutes is awesome. I am so glad you like the recipe and are already rocking out the variations:) Your cherries, carob chips, and cinnamon combo is going on my to make list.
Sherrie | With Food + Love says
Meg - I love how versatile this recipe is. Literally you could make so many flavor combinations, I will be for sure sharing this with my health coaching clients, pinning + tweeting :)))
XO SHERRIE
Meg says
Thanks so much Sherrie!!! They are so much fun to make, and you are right. The combinations are endless. I plan on adding links to this post as I create more raw bar recipes so I hope that your clients will all be able to find something that they like.
Kim says
I think I'll make these today! How long would you say they'd last?
Meg says
Kim, in the fridge they should last at least a week! I hope you enjoy them as much as we do.