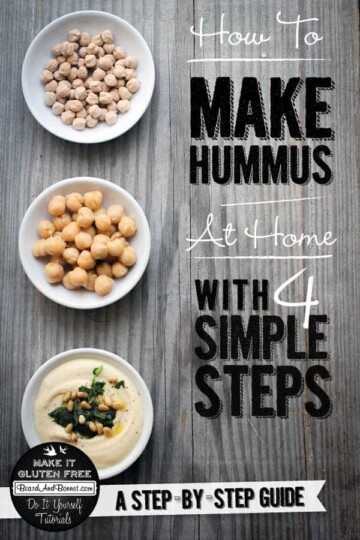
Last week when we made homemade tahini I promised that I would share with you how to make hummus at home from scratch. My reasoning for this was simple; first, I really wanted to show you how to make hummus and second, I REALLY wanted a reason to make a fresh batch of hummus for us to enjoy. I often find myself grabbing humus at the store for quick, easy snacks, or picking it up from our local Mediterranean restaurant. But friends, it just isn't the same as making it at home. Homemade hummus tastes better, it is fresher, has no preservatives, and it is 50% cheaper! In today's tutorial we will be utilizing that delicious tahini that we made last week, but you can absolutely use store-bought tahini in this recipe too. I implore you though to at least give making both tahini and hummus from scratch a try once; you will be hopelessly hooked and shocked at how easy it is and how much money you can cut out of your grocery bill.
I used to make hummus at home using canned beans and store bought tahini myself. I thought it was great compared to the pre-made hummus at the grocery, but then I picked up a copy of Yotam Ottolenghi & Sami Tamimi's Jerusalem: A Cookbook. Just one look at the images in that book, especially the ones of hummus, convinced me that I had been going about the hummus making process all wrong. When I made authentic hummus for the first time at home it was a game-changer. The little bit of extra effort is SO worth it. You will feel as if you are dining on hummus at the fanciest restaurant you have ever visited and instead of paying top dollar for a super star chef to make it you will have the satisfaction of knowing that it came from your own kitchen.
Step 1: Soak your garbanzo beans (AKA: chickpeas) overnight.

The evening before you want to make the hummus place the dried garbanzo beans in a large bowl and cover with water two to three times their volume. Garbanzo beans will absorb so much water that they will swell up to three times their original size during the soaking process.

Step 2: Cook the garbanzo beans.

The next day drain the garbanzo beans and rinse well. In a medium saucepan over high heat combine the garbanzo beans and the baking soda, stirring constantly for 3 minutes. My understanding from LOTS of Googling is that cooking the beans with the baking soda this way will alleviate some of the potential gassiness that fresh beans can cause.
Add 6 ½ cups water to the pot and bring the beans to a boil. Continue to cook the beans over medium-high to high heat for anywhere from 20 - 40 minutes depending on freshness. Basically, the older your beans are the longer they have to cook. Skim off any foam or skins that float to the surface during the cooking process with a slotted spoon and discard them. When the beans are tender enough to break up easily, but not turn to mush when pinched between your thumb and finger they are done. Drain the cooking liquid.
Step 3: Blend, blend, blend.
Transfer the cooked garbanzo beans to a food processor fitted with the "S" blade and process until a thick yellowish paste forms like in the picture below.

With the machine running, add the homemade tahini, lemon juice, garlic, and salt. Once they have been incorporated drizzle in the ice-cold water and continue to process for 5 minutes until the hummus is smooth and velvety.

Step 4: Allow the hummus to rest for 30 minutes.
Those beautiful little garbanzo beans have been through a lot at this point!! Transfer the hummus to a bowl and cover the surface with plastic wrap so that there is no way that air can get in between the hummus and the plastic wrap. Let the hummus sit for 30 minutes at room temperature, during this time the hummus will thicken slightly.

When you are ready to serve up your hummus you can add any kinds of toppings you like. I like to scoop about 1 ½ cups of hummus into a shallow bowl and top with toasted pine nuts, ¼ cup chopped roasted red bell pepper, 1 tablespoon chopped flat leaf parsley, fresh cracked pepper, and a drizzle of olive oil. The sky is the limit here, there are no wrong mixin's it is all about your personal taste. This hummus is a great on its own with fresh veggies and gluten free crackers for dipping, but for a real treat serve this hummus up with homemade gluten free naan and authentic golden falafel. Seriously, go ahead...spoil yourself!

This recipe makes A LOT of hummus...about 6 large servings to be exact so store any hummus that you will not be eating immediately in the refrigerator with plastic wrap on the surface to prevent air from getting in and creating a hardened skin on the surface. I have found that the hummus continues to thicken slightly in the fridge, so if you want that creamy texture back to your hummus that it had right after you made it simply allow the hummus to sit at room temperature for 30 minutes before serving.
[mc4wp_form id="7635"]
PrintHow To Make Hummus (Gluten Free & Vegan)
- Yield: 6 servings 1x
Ingredients
- 1 ¼ cups dried garbanzo beans
- 1 teaspoon baking soda
- 6 ½ cups water
- 1 cup ten Free & Vegan)">homemade tahini
- Juice of 2 lemons
- 4 cloves garlic, crushed
- 6 ½ tablespoons ice water
- 1-2 teaspoons salt, depending on taste
Instructions
- The evening before you want to make your hummus place the dried garbanzo beans in a large bowl and cover with water two to three times their volume.The next day drain the garbanzo beans and rinse well.
- In a medium saucepan over high heat combine the garbanzo beans and the baking soda, stirring constantly for 3 minutes.
- Add 6 ½ cups water to the pot and bring the beans to a boil. Continue to cook the beans over medium-high to high heat for anywhere from 20 -40 minutes depending on freshness. Skim off any foam or skins that float to the surface during the cooking process with a slotted spoon and discard them. When the beans are tender enough to break up easily, but not turn to mush when pinched between your thumb and finger they are done. Drain the cooking liquid.
- Transfer the cooked garbanzo beans to a food processor fitted with the "S" blade and process until a thick yellowish paste forms.
- With the machine running, add the homemade tahini, lemon juice, garlic, and salt. Once they have been incorporated drizzle in the ice-cold water and continue to process for 5 minutes until the hummus is smooth and velvety.
- Transfer the hummus to a bowl and cover the surface with plastic wrap so that there is no way that air can get in between the hummus and the plastic wrap. Let the hummus sit for 30 minutes at room temperature, during this time the hummus will thicken slightly.
Notes
Adapted from [url href="Jerusalem: A Cookbook"][/url]
Disclaimer: This post contains affiliate links, I may get a small commission if you decide to purchase a product through one of those links. This revenue makes it possible for me to continue to provide you with great recipes and maintain this site. Thank you for supporting us here at Beard and Bonnet!


Amber says
This looks sooooo wonderful! I don't have a food processor...might a blender work?
thismess says
You should be fine with a blender, you may just have to stop and scrape down the sides a bit more than with a food processor.
F. Geero says
Sorry to say but I discovered that a spanish publication called "Revista cocina" is stealing your photos.
You can google or follow the link http://www.revistacocina.com/receta-de-humus/
:/
Meg says
Thank you so much for pointing this out to me! I really appreciate it and will take measures to have my images removed from their site.
Kristin says
Homemade hummus is on my to do list this w/e. 😀 YUM!!
One of the beautiful things about hummus,... vegans, vegetarians, & omnivores can all appreciate it. :)) It always pins well. LOL
Thank you for all that you do!
Pinned,
K-
Meg says
You are going to LOVE this recipe!! I agree that it is awesome we can all come together over a big bowl of hummus! Thanks so much for leaving comments on my posts,they really make my day:)
Maggie says
Yum! When I was teaching one of my students brought in hummus (her family was from the Middle East). It looked like your hummus! Sooooo creamy and smooth. I can't wait to try your method Meg. I add kombu to my beans while they're soaking. It adds some B vits from the sea veg and enhances digestibility. Win win! You always have the best toppings, I'm coming to eat at your house!
Meg says
Maggie, you are welcome at my house any time! I have actually never cooked with kombu. I have such a severe reaction to fish and shell fish that all things from the sea scare me. Although I am well aware that veggies from the ocean wont hurt me. I need to break out of my fear and try cooking with kombu I think. Does it effect the flavor at all of the beans?
Maggie says
Oh my, that fear makes perfect sense! I won't bring any fish with me when I come for dinner 🙂 It doesn't effect the flavor that I've noticed. You can also cook the beans with the kombu but I tried it once and it got all gooey so it totally turned me off, I stick to soaking only now.
cheri says
I've made my own hummus before and it was incredible, so much better than store bought. The only difference I can see is that I peeled my chick peas and it looks like you blended yours which makes way more sense. Beautiful pics!
Meg says
Cheri I sometimes will peel canned chickpeas if I am using them, but I don't have to when I make them this way:)
Katrina @ Warm Vanilla Sugar says
Homemade is definitely the way to go. I love this recipe!
Meg says
I completely agree Katrina!
Cassidy @ Cassidy's Craveable Creations says
What a great tutorial!!! I pinned this and can't wait to make it, it looks delicious 🙂
Meg says
Thanks Cassidy!
Tania @ The Cook's Pyjamas says
I love to make my own hummus. It really is a completely different product to store bought. Hummus actually freezes quite well, so if you make a huge batch and don't think you will use it all then freeze it. It will thicken slightly, but you can thin it out with a touch of water or lemon juice. I use the frozen stuff for spreading in rolls etc.
By the way, it is the long overnight soak in lots of water that helps reduce gas. The gas is caused by the long chain sugars in the beans which our bodies struggle to digest. Soaking leaches these sugars out of the beans, making them easier to digest. I have had no problems with my own beans since starting to soak them and I never use baking soda. But I do have problems with canned beans as most are not soaked.
Meg says
Tania that freezing tip is priceless! I never though of freezing hummus. Now I will be making double batches. Mwahahaha! I always soak my beans as well and don't really have a problem either when I do that. I only found one or two explanations as to why to cook the beans with baking soda so I shared what I found. Next time I make it though I may try cooking the beans without the baking soda and see what happens.
Tania @ The Cook's Pyjamas says
Oops. Sorry to enable you 🙂 My child went through a phase of having hummus in her sandwiches every day and I couldn't keep up with production which is how I stumbled upon the freezing idea. As to the baking soda, I think it is an old method. I have one or two old vegetarian books that call for baking soda. To make your beans more digestible you can cook with kombu as Maggie suggests below (although it will break down in the cooking process which is good for nutrition, not so good for aesthetics) or if you are worried about your allergies you can add a pinch of asafoetida to the cooking beans which will also aid in digestibility.